Article
ATastyBellPepper
2023-10-30

Introduction
Growing your own fruits and vegetables is a rewarding and sustainable way to have access to fresh and nutritious produce. Edible gardening allows you to have control over what you eat, save money on groceries, and enjoy the satisfaction of harvesting your own food. In this article, we will explore the basics of edible gardening and provide tips for successful cultivation.
1. Start with a Plan
Before you begin, consider the space you have available for gardening. Evaluate factors such as sunlight exposure, soil quality, and the amount of available water. Plan what fruits and vegetables you want to grow, taking into account your climate and the growing requirements of each plant.
2. Prepare the Soil
Good soil is essential for healthy plant growth. Prepare your soil by removing any weeds and loosening it with a garden fork or tiller. Amend the soil with organic matter, such as compost or well-rotted manure, to improve its fertility and drainage. Conduct a soil test to determine if any additional nutrients are needed.
3. Choose the Right Plants
Select plants that are suitable for your climate and growing conditions. Consider the space available, the amount of sunlight, and the water requirements of each plant. Start with easy-to-grow crops like tomatoes, lettuce, herbs, and zucchini. Consider planting a mix of annuals and perennials to ensure a continuous harvest throughout the growing season.
4. Provide Adequate Watering
Water your edible garden regularly, aiming for consistent moisture levels. Most plants require about 1 inch of water per week. Avoid overwatering, as it can lead to root rot and other diseases. Consider using drip irrigation or soaker hoses to deliver water directly to the plant roots and minimize water waste.
5. Practice Proper Plant Spacing
Follow the recommended spacing guidelines for each plant to ensure proper air circulation and to prevent overcrowding. Overcrowded plants are more prone to diseases and pests. Proper spacing also allows each plant to access adequate sunlight and nutrients.
6. Control Pests and Diseases
Monitor your plants regularly for signs of pests and diseases. Inspect the leaves, stems, and fruits for any abnormalities. Use organic pest control methods whenever possible, such as handpicking pests, using insecticidal soaps or oils, or introducing beneficial insects. Remove any diseased plants or plant parts promptly to prevent the spread of diseases.
7. Harvest at the Right Time
Harvest your fruits and vegetables at their peak of ripeness. Each crop has its own signs of maturity, such as color, size, or firmness. Harvesting at the right time ensures the best flavor and nutritional value.
8. Rotate Crops
Practice crop rotation to prevent the buildup of pests and diseases in the soil. Avoid planting the same crop in the same location year after year. Rotate plants from different families to disrupt pests' life cycles and reduce the risk of disease transmission.
Conclusion
Edible gardening is a rewarding and sustainable way to grow your own fruits and vegetables. By starting with a plan, preparing the soil, choosing the right plants, providing adequate watering, practicing proper plant spacing, controlling pests and diseases, harvesting at the right time, and rotating crops, you can successfully cultivate a thriving edible garden. Enjoy the benefits of fresh, nutritious produce right from your backyard, and take pride in your ability to sustainably feed yourself and your family.
0
0
Article
lrgarden
2022-07-28

Alcohol consumption has been a tradition for humans throughout history, whether during social gatherings, athletic events, or religious rites. In fact, evidence shows that cavemen cultivated grains and fruits for the purpose of fermenting them to produce alcoholic drinks. However, the fact that people still use alcohol worldwide today, despite the fact that we may never know for sure when, when, or how it all began, cannot be denied.
Alcohol may initially make you feel more extroverted when used in moderation, but when consumed in excess, it might make you feel as like you don't want to do anything or be around anybody. So, before you go out and enjoy another glass of your favorite New Zealand Zinfandel or perhaps try to cool off with an ice-cold pint of Guinness at the Irish pub down the street, you might want to take the time to carefully consider some of the potential side-effects of alcohol, especially how it can affect your mood, judgment, and energy levels.
Over the last 20 years, as a professional addiction counselor and interventionist, I have dealt with many wonderful individuals who have found themselves acting in dubious or harmful ways when under the influence of alcohol. Alcohol-impaired driving was a factor in around 28% of traffic-related deaths in the United States, while the World Health Organization estimates that about 55% of those who commit domestic violence consumed alcohol before the attack.
Even while each situation may be different, many of the underlying causes of alcohol dependence are constant. For instance, the majority of those who have struggled with alcohol misuse difficulties first began by sometimes and occasionally at certain gatherings partaking in alcohol. Then, with time and repeated usage, they built up a tolerance to it, requiring increasing amounts of alcohol to produce the desired effects, such as drunkenness.
In addition, due to the negative effects that alcohol usage has on the central nervous system over time, your body may actually grow reliant on it in order to operate, although dysfunctionally.
Many of my alcohol-dependent clients have often confided in me that they required a glass of alcohol simply to get out of bed in order to calm their anxiety and get unstuck. As a result, alcoholics frequently spend a considerable amount of time and effort ensuring that there is always an ample supply of alcohol on hand, while also drastically reducing the amount of time they spend on other important daily activities like work, personal hygiene, a healthy diet, exercise, and interpersonal relationships.
Despite alarming numbers, the fact is that alcohol usage is here to stay. There is no going back to prohibition. Therefore, whether you are interested in drinking or not, I believe it is necessary to understand how to live with it rather than attempting to demonize its existence or just pretending that the issue does not exist.
Having said that, and without intending to spoil anyone's plans for an upcoming party, if you are concerned about the significance of retaining control over your mood, judgment, and level of energy, you are probably also prepared to learn more about the effects that alcohol may have on your body.
1. Alcohol Raises Depression Risk
First, let's talk about how alcohol impacts the body. Alcohol is categorized as a depressive since it seems to lessen central nervous system activation and alertness. Although alcohol may at first make you feel better because it starts to interact with dopamine and serotonin receptors in the brain, over time, with continued use and your emotional guard down, you may experience overwhelming depression because the alcohol starts to drain those chemicals from your brain, making you much more susceptible to emotional distress.The more alcohol you consume, the more sad you feel and, therefore, the less active you become as your energy level is diminished, much like the chemical equivalent of a self-destructive self-fulfilling prophesy.
2. Drinking Decreases Your Energy Level
Your energy level may be decreased by consuming alcohol in a number of different ways. The first thing that happens when you drink alcohol is that it initially elevates your blood sugar level; but, as soon as insulin is released into your circulation, your blood sugar level quickly drops, leaving you feeling weak. Although drinking alcohol increases your intake of fluids, you will normally discover that you urinate more often as your kidneys work extra hard to remove the alcohol from your body. Dehydration follows, which lowers your level of energy because an excess of essential minerals and nutrients are flushed away.Additionally, it has been shown that drinking alcohol alters your body's melatonin levels, which are essential for controlling your circadian rhythm and your natural sleep-wake cycle. Your body won't be able to recharge if you don't get enough sleep, which will affect your stamina and endurance.
3. Your Reaction Time Is Slower After Drinking
Having said all of that, consuming alcohol does not automatically cause you to feel melancholy; rather, it slows down communication between the brain and the body. It effectively slows down your reflexes.When you initially start drinking, you could feel more engaged and lively. However, as you continue to consume alcohol and depress your central nervous system, you might start to feel more tired and imbalanced. Recent research has shown that alcohol has little to no medical value and is instead directly related to alterations in brain chemistry and composition.
4. Alcohol Lowers Inhibitions
However, not all of alcohol's consequences are inherently negative, at least not straight away. Alcohol has been shown to lower inhibitions when used in moderation, which slows down response time. To put it another way, drinking alcohol may prevent your brain from processing fear that you may have felt in a circumstance like meeting new people at a party or even even spending time with your in-laws without it. Sadly, however, lowering your inhibitions may also make it harder for you to determine when it's safe to take another drink, which might eventually result in errors of judgment.5. Alcohol Affects Your Decision-Making
Long-term alcohol consumption has been found to really change the anatomy of the brain, particularly in the prefrontal cortex, which governs judgment and thinking. As a consequence, drinking too much and making poor judgments like driving while intoxicated or drinking at work are strongly correlated. Alcohol is also seen as a gateway drug since it may lead to the use of increasingly stronger mood-altering drugs because it impairs judgment.We also need to be able to respond quickly and precisely when the chance arises while still being able to show affection and attention to the people we care about since the majority of us are hard-working individuals who need to contribute both financially and emotionally. So, rather than actually forgoing a fun night out with your friends, you might want to just think twice before ordering another drink at the club, especially if you want to avoid all of the unfavorable consequences that could result from bad judgment, such as legal, financial, medical, and family issues.
Conclusions
In conclusion, the majority of persons who sometimes drink will probably never suffer any severe effects from alcohol consumption. Others may not even be aware of the effects alcohol has on their body. But knowing the effects that frequent alcohol use could have on you might actually stop that from occurring.Whether you approve of or disapprove of the use of adult alcoholic drinks, the fact remains that alcohol has been produced for a very long time. It is still offered all over the globe at social gatherings, athletic events, religious ceremonies, and pretty much wherever else you look. However, I fully think that everyone should be aware of the effects that alcohol may have on you before consuming it considering the fact that it can directly alter your mood, judgment, and level of energy.
Alcohol may help you feel a little bit more outgoing and engaged by lowering your inhibitions. However, over time and with repeated usage, it can cause episodes of sadness because it clouds your judgment and saps your vitality.
0
0
Article
atastybellpepper
2022-07-17

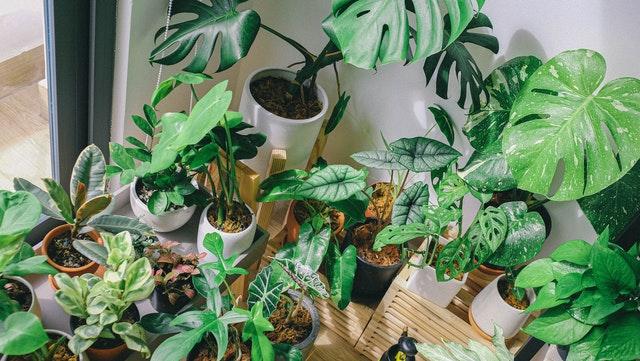
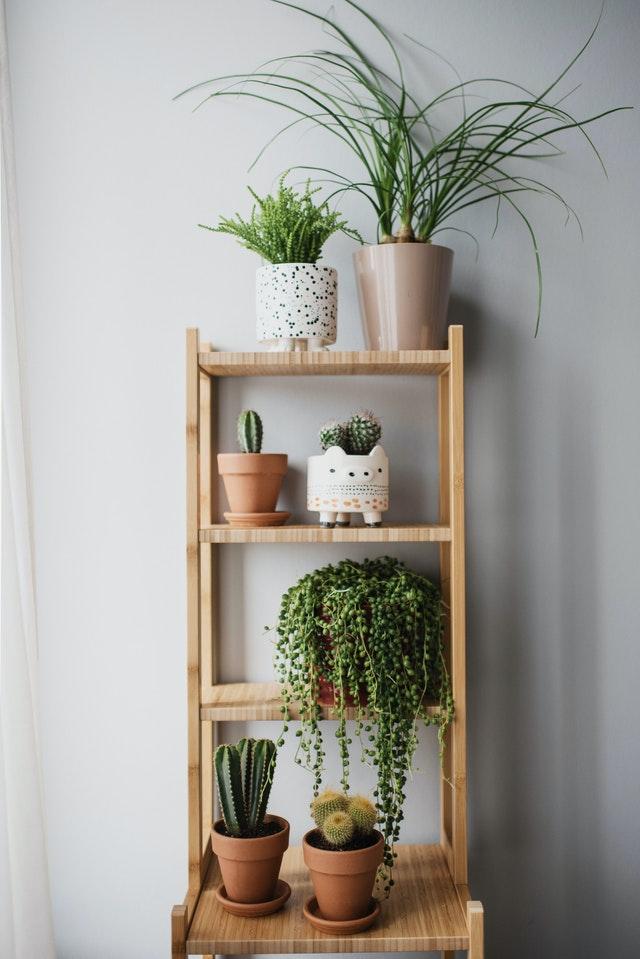
You should really be able to grow plants even if you reside in a small flat. In addition to common houseplants, an apartment garden may support a variety of herbs, fruits, and vegetables. When you're just learning how to plant, start with a few small pots. Considerations like sunlight exposure and the overall weight of your containers must be made. Here's how to create a beautiful apartment garden.
1. Soil
Water, oxygen, and nutrients are all provided for plants by their soil. You can't use regular garden soil since it would clump in pots, restricting access to oxygen and preventing water from flowing through. This is because your apartment garden will probably incorporate containers. Consequently, a potting mix that drains effectively is required. Potting mix is airy and light, effectively moving oxygen and water to maintain healthy roots. You won't need to be concerned about bringing illnesses or bugs into your flat since it is reasonably sanitary.
2. Water
Container plants need a lot of water, often many times each day. So choose a location for your container garden that is close to a water source. Carrying watering cans can get tiresome, particularly if you need to water many containers at once. If your arrangement allows it, think about getting a hose that can be connected to a sink faucet. When you need it, it is convenient, and when you don't, it coils up.
3. Sunlight
The majority of blooming and fruiting plants need a full day of sunlight. This translates to six to eight hours of direct sunlight each day. Especially in a city where towering buildings might obstruct the sun for at least part of the day, this can be difficult to find in an apartment. The greatest chances of getting full sun are on balconies and roofs. If you're planting on a windowsill, you have two options: either choose plants that don't need as much light, like certain herbs and salad greens, or add a grow light to simulate the sun's rays.
4. Humidity
When the heat is on, you may need to add some additional humidity if you are growing your plants inside on a ledge. You may either put the plants on a tray of water or spritz them with a light mist to aid.
5. Wind
Your plant pots may need additional protection if your plants will be exposed to strong winds, particularly if they will be on a rooftop or balcony. Wind has the power to rip apart foliage and topple pots. So make a wind barrier available, such a screen or railing. Alternately, make sure your pots are large and substantial enough to secure the plants.
6. Weight
Although soil-filled containers are already heavy, their weight might increase by three times when they are saturated with water. Make sure the position of your apartment's garden can support the weight. It will be necessary to fasten window boxes to the windowsill. Additionally, find out if there are any weight limitations from your landlord or the building board if you're gardening on a balcony or rooftop.

1. Herbs: Many herbs perform well in containers, but they won't become as big and bushy as they would if they were planted in the ground outside. Additionally, if you harvest regularly, you may need to replace your plants. But having access to fresh herbs while cooking is amazing. Mint, chives, parsley, lavender, basil, thyme, and other herbs are some of the best plants for apartment gardening.
lettuce greens Favorite salad ingredients like lettuce, spinach, and arugula are shallow-rooted, quickly growing plants. If they have enough water, they aren't too picky about their growth circumstances.
2. Tomatoes: Although tomato plants may become bulky and heavy, they thrive in containers. They will thrive in a container with a minimum diameter of 14 inches, however bigger is preferable. The patio varieties may be grown in a hanging basket. Make careful you choose a determinate or dwarf tomato variety.
3. Chili peppers: If you like spice, hot pepper plants do extremely well in containers and may produce fruit all year long. Sweet peppers may also be grown in containers, although they normally don't perform as well as hot peppers.
4. Meyer lemons: Dwarf citrus trees are among the simplest fruits to cultivate in a container. If they get six to eight hours of direct sunlight each day combined with some humidity, meyer lemons thrive inside. Lemon trees emit a sticky sap, so place something beneath the pot to protect your floors and furnishings.
5. Strawberry: A window box filled with strawberries is both aesthetically pleasing and appetizing. For the greatest fruit, strawberry plants typically need at least six hours of sunlight every day and continuously damp (but not soggy) soil.
Watering is by far the most crucial gardening chore. Even if rain falls on your garden, there most likely won't be enough water. As your plant develops, the dirt in containers dries up rapidly. Use your finger to probe the dirt about an inch or so below the surface. It needs watering if it seems dry.
1. Feeding: In accordance with each plant's specific growth needs, you must feed your plants on a regular basis. The simplest technique is often to apply a water-soluble fertilizer when you water. Inspect your potting mix to see whether it contains fertilizer; if it does, you won't need to feed your plants as often.
2. Problems: No matter where you cultivate plants, pests and illnesses will eventually find them, and there are no natural predators for insects inside. Every time you water or harvest your plants, check them for issues. Move a plant away from the other plants until the issue is fixed if you see evidence of pests or illnesses, such as discoloration or holes in the leaves.
3. Harvesting: Find out when your particular plants are ready to be picked, and then don't put off enjoying the rewards of your toil. In certain circumstances, harvesting encourages the plant to grow more food that you can collect.
There isn't usually a ton of room available in apartments for gardening. However, there will inevitably be a sunny spot where you may exercise your green thumb and sample the results of your effort.
Apartment Plant Growing Instructions
All plants have certain growth conditions that must be fulfilled, while some are more resilient and forgiving to novice gardeners than others. When selecting plants for your apartment garden, keep the following factors in mind:1. Soil
Water, oxygen, and nutrients are all provided for plants by their soil. You can't use regular garden soil since it would clump in pots, restricting access to oxygen and preventing water from flowing through. This is because your apartment garden will probably incorporate containers. Consequently, a potting mix that drains effectively is required. Potting mix is airy and light, effectively moving oxygen and water to maintain healthy roots. You won't need to be concerned about bringing illnesses or bugs into your flat since it is reasonably sanitary.
2. Water
Container plants need a lot of water, often many times each day. So choose a location for your container garden that is close to a water source. Carrying watering cans can get tiresome, particularly if you need to water many containers at once. If your arrangement allows it, think about getting a hose that can be connected to a sink faucet. When you need it, it is convenient, and when you don't, it coils up.
3. Sunlight
The majority of blooming and fruiting plants need a full day of sunlight. This translates to six to eight hours of direct sunlight each day. Especially in a city where towering buildings might obstruct the sun for at least part of the day, this can be difficult to find in an apartment. The greatest chances of getting full sun are on balconies and roofs. If you're planting on a windowsill, you have two options: either choose plants that don't need as much light, like certain herbs and salad greens, or add a grow light to simulate the sun's rays.
4. Humidity
When the heat is on, you may need to add some additional humidity if you are growing your plants inside on a ledge. You may either put the plants on a tray of water or spritz them with a light mist to aid.
5. Wind
Your plant pots may need additional protection if your plants will be exposed to strong winds, particularly if they will be on a rooftop or balcony. Wind has the power to rip apart foliage and topple pots. So make a wind barrier available, such a screen or railing. Alternately, make sure your pots are large and substantial enough to secure the plants.
6. Weight
Although soil-filled containers are already heavy, their weight might increase by three times when they are saturated with water. Make sure the position of your apartment's garden can support the weight. It will be necessary to fasten window boxes to the windowsill. Additionally, find out if there are any weight limitations from your landlord or the building board if you're gardening on a balcony or rooftop.
Suitable Plants for Apartments
To a certain degree, almost every plant may be grown in a container. A full-sized apple tree, for instance, would not be feasible, but there are thin columnar types that can fit in a one-square-foot section of your balcony. After considering the foods you love eating, choose a few different plant varieties to try out. You may begin with seeds, which are more diverse and less expensive. However, young nursery plants will help your garden get started faster.1. Herbs: Many herbs perform well in containers, but they won't become as big and bushy as they would if they were planted in the ground outside. Additionally, if you harvest regularly, you may need to replace your plants. But having access to fresh herbs while cooking is amazing. Mint, chives, parsley, lavender, basil, thyme, and other herbs are some of the best plants for apartment gardening.
lettuce greens Favorite salad ingredients like lettuce, spinach, and arugula are shallow-rooted, quickly growing plants. If they have enough water, they aren't too picky about their growth circumstances.
2. Tomatoes: Although tomato plants may become bulky and heavy, they thrive in containers. They will thrive in a container with a minimum diameter of 14 inches, however bigger is preferable. The patio varieties may be grown in a hanging basket. Make careful you choose a determinate or dwarf tomato variety.
3. Chili peppers: If you like spice, hot pepper plants do extremely well in containers and may produce fruit all year long. Sweet peppers may also be grown in containers, although they normally don't perform as well as hot peppers.
4. Meyer lemons: Dwarf citrus trees are among the simplest fruits to cultivate in a container. If they get six to eight hours of direct sunlight each day combined with some humidity, meyer lemons thrive inside. Lemon trees emit a sticky sap, so place something beneath the pot to protect your floors and furnishings.
5. Strawberry: A window box filled with strawberries is both aesthetically pleasing and appetizing. For the greatest fruit, strawberry plants typically need at least six hours of sunlight every day and continuously damp (but not soggy) soil.
Garden Care for Apartments
You may anticipate doing the following duties on a regular basis in your apartment garden:Watering is by far the most crucial gardening chore. Even if rain falls on your garden, there most likely won't be enough water. As your plant develops, the dirt in containers dries up rapidly. Use your finger to probe the dirt about an inch or so below the surface. It needs watering if it seems dry.
1. Feeding: In accordance with each plant's specific growth needs, you must feed your plants on a regular basis. The simplest technique is often to apply a water-soluble fertilizer when you water. Inspect your potting mix to see whether it contains fertilizer; if it does, you won't need to feed your plants as often.
2. Problems: No matter where you cultivate plants, pests and illnesses will eventually find them, and there are no natural predators for insects inside. Every time you water or harvest your plants, check them for issues. Move a plant away from the other plants until the issue is fixed if you see evidence of pests or illnesses, such as discoloration or holes in the leaves.
3. Harvesting: Find out when your particular plants are ready to be picked, and then don't put off enjoying the rewards of your toil. In certain circumstances, harvesting encourages the plant to grow more food that you can collect.
There isn't usually a ton of room available in apartments for gardening. However, there will inevitably be a sunny spot where you may exercise your green thumb and sample the results of your effort.
1
1
sososo: wow!I just saw this article when I was about to grow some flowers.😍
atastybellpepper: Great article
Article
atastybellpepper
2022-07-04
Edging is the final touch for every sort of garden, whether you're producing fruits, vegetables, herbs, or flowers. Annual and perennial flower beds will seem more polished and your mulch will remain in place if you add edging around them. It will also enhance the curb appeal of your property by adding character and charm.
Garden edging installation requires some work as well. Gather your equipment first, including gardening gloves, a kneeler pad, an edge shovel, a garden spade, and a rake.
The finest materials for edging garden beds are listed below.
paving stones
Concrete pavers are almost unbreakable. However, they are difficult to handle and time-consuming to install, so prepare for many days of laborious lifting and digging. Pavers may be used to create walkways or simply as bed edges.
Pros: endures long and looks fantastic
Cons: takes a long time to install
2. Weaved Willow
This organic edge, often known as "wattle," is ideal for English or rural gardens. In Europe, it is widely utilized.
Positives: Beautiful when used appropriately
Cons: Expensive for big areas and easily damaged
3. Pure Rock
There are a variety of sizes, hues, and forms of rocks, and creeping flowers look stunning falling over them! Simply place pebbles along each bed's edge; for the most visual effect, use boulders that are at least the size of a softball. For possibilities, go to a nursery or garden shop.
Pros: endures forever
Cons: It takes time to assemble them attractively.
4.Brick
Bricks may be stacked upright or laid in a shallow trench with the broad side down. Getting everything level is the most challenging aspect. Use a line level on a string and a rubber mallet as a tip.
Pros: lasts indefinitely and is reasonably priced
Cons: Installation is labor-intensive
5.Poured Concrete You must first construct a form, then mix and pour concrete into the mold, thus this is normally not a DIY project for beginners. Because errors are difficult to correct, take into account hiring a professional.
Pros: has a long lifespan
Cons: Future years won't be as easy to change the planting bed's configuration.
Recycled Rubber Edging, No. 6
A few businesses currently produce pounded-in rubber edging. Since it's often manufactured from recycled tires, it's almost unbreakable.
Pros: lasts forever
Not attractive in formal or cottage gardens.
7. Landscape Wood
If you're skilled with a saw, using landscaping timbers as an edger will save you money. To stop decaying, they are often pressure-treated. The ground will need leveling and cutting as necessary.
Pros: Cost-effective and durable
Cons: Not suitable for use in making curving borders
8. Artistic Fence
It's really simple to line the perimeter of a garden with little fence parts. You may choose from a wide range of sizes and varieties, including those made of metal, wood, and plastic, to match the design of your garden.
Pros: Simple to locate
Cons: Easily harmed and unable to secure mulch.
0
0
sososo: Plants really need careful care.
Article
atastybellpepper
2022-06-28
You have the exceptional chance to grow an avocado tree outside in your yard if you reside in the southernmost point of the United States or further south. The creamy fruits of these tall, evergreen fruit trees are prized for their wealth of health advantages. The rich, vivid green foliage of the tree is also cultivated for its aesthetic appeal. But it's crucial to remember that this tree's whole body, including the fruit, is poisonous to a variety of creatures.
Avocado Tree Planting Instructions
Avocado trees should ideally be planted outside in the spring. This gives the tree plenty of time to establish itself before the chilly winter weather arrives. This is particularly crucial in the hardiness zones for avocado trees in the north. Select a planting place where there will be enough space for these tall trees to flourish. If you're planting more than one avocado tree, space them at least 30 feet apart and at least 10 feet away from any buildings.
Remember that avocado trees have very delicate roots, so while planting them, try to avoid disturbing them needlessly. Excavate a hole that is larger than the root system. Since planting a tree too deep or too shallowly might lead to issues, the depth of the hole should typically equal the height of the root ball.
Very young, delicate, and immature trees may benefit from support since the trees are sensitive to strong winds. Your tree will stay upright and healthy if you choose a planting place that provides wind shelter. Just make sure your tree gets lots of sunshine and soil that drains adequately. Before planting, amend the soil with sand or similar well-draining substrate if the soil isn't in the best possible condition. It is also possible to cultivate avocado trees in containers, although this will ultimately restrict their development.
Care of Avocado Trees
Light
The avocado tree need a lot of sunlight to grow, like other tropical plants. Give this tree at least 8 hours of direct sunshine every day when you plant it. Although these trees may tolerate some shade, full sun is optimum for their growth and fruit production.
Avocado trees like loamy, rich soil that drains well. In order to prevent root rot, it's crucial that the soil be aerated and doesn't retain too much water. Ideal soil pH ranges from 5 to 7, which range from acidic to neutral. Alkaline soil may harm these trees.
By adding a layer of mulch all around the tree, you can preserve its shallow root system and help the soil retain the correct amount of moisture. In order to prevent smothering the roots or creating collar rot, be sure to keep the mulch approximately 6 inches away from the base of the tree.
Water
Deep, infrequent irrigation is beneficial for avocado plants. This promotes root development that is stronger and deeper. Wait until the soil starts to dry up before providing enough watering. The avocado tree may need more regular watering throughout the summer when it is hot and the weather may be dry. Young trees also need to be watered more often as they grow. Around 2 inches of water per week should be given to mature trees.
Thermodynamics and Humidity
Unless you want to grow an avocado tree inside, these well-known fruit trees can only be cultivated outside in USDA hardiness zones 9–11, restricting them to tropical and subtropical regions. They like growing at temperatures between 50 and 85 degrees Fahrenheit and are frost-sensitive.
Fertilizer
An avocado tree will produce more fruit and develop healthier if fertilized throughout the growing season. Depending on the exact directions contained with your selected fertilizer, begin in the late winter or early spring and continue feeding until the autumn. Make sure the fertilizer you choose has high levels of nitrogen since this tree needs it. It works well to use fertilizers made particularly for citrus or avocado plants.
Pollination
An avocado tree may be challenging to pollinate. These trees have blooms that have both female and male components, or what are known as "perfect" flowers. The female and male sections of avocado tree flowers bloom at different times, making self-pollination feasible but not always successful. It is essential to have two avocado plants for best pollination.
There are two types of avocado trees: type A and type B. The male portions of Type A trees open in the afternoon of the second day after the female parts open in the morning of the first day. The male portions of Type B trees open in the morning of the second day, whereas the female parts open in the afternoon of the first day. Cross-pollination between the two varieties is made feasible by these various timeframes. For the greatest outcomes, plant both type A and type B trees when selecting which ones to plant.
Avocado Tree Types
The three primary kinds of avocado trees are Mexican, West Indian, and Guatemalan. There are a number of avocado varietals available within these categories.
Hass: One of the most well-liked avocado kinds, you can often find Hass avocados in supermarkets. It is a cross between the avocado cultivars from Guatemala and Mexico. This tree is a type A, and its fruits have thick, rough surface and a creamy, rich inside. In comparison to other types, it is more heat sensitive. When cultivated independently, Hass avocado trees are known to generate a respectable amount of fruit.
Fuerte: The Fuerte avocado, another well-known variety, is a type B tree that is often planted alongside Hass avocados. This type is also a cross between Mexican and Guatemalan strains. Large, oval-shaped fruits with generally smooth, thin skin that comes off easily are produced by these plants. The fruit's oil content is lower than that of Hass avocados. These trees are better suited for the northern limits of the avocado growth zones since they are also more heat-sensitive.
Pinkerton: This Guatemalan tree of type A is well-liked for its compact stature and abundant fruit production. It yields oblong fruits with flesh that is creamy and luscious, much like the Hass avocado. To give a sizable crop, these plants need an avocado tree of type B.
obtaining avocados
Since avocados need a lot of time and commitment to develop, picking them from your own garden is fulfilling. You may anticipate fruit on nursery-purchased trees in three to four years. Avocados grown from seeds might take five to thirteen years to bear fruit.
Wait until the avocado reaches its full size once the fruits start to emerge. Avocados are harvested as soon as they reach their full size since the fruit does not ripen on the tree. Bring the avocados indoors, where you should let them to ripen on a counter. Test the avocado's suppleness by giving it a little squeeze. Enjoy the results of your labor after the meat is tender but not mushy.
Growing Avocado Trees in Containers
Avocado trees can be preserved in pots, however they won't grow to their maximum height in them. Due to the ease with which potted trees may be relocated to a sheltered place when cold weather strikes, this is perfect for tiny yards or gardens close to the northern limit of the avocado's growth zones.
It is best to choose young trees or dwarf kinds since they will remain tiny for a while. Make sure the container you choose has unblocked drainage holes and good drainage. Breathable materials, like terra cotta, are a wise option since they allow both air and water to pass easily through the container. Sand and compost are examples of well-draining soil you may use to fill the container.
Pruning
Avocado tree pruning will promote more controllable, bushy growth. Starting while trees are young is ideal. If the plant was produced from seed, begin trimming when it was just 6 inches tall by chopping off the top pair of leaves. Trim back 6 inches after it reaches a foot in height. After that, trim the tree every year.
Mature trees need to be pruned every so often to keep them tidy and provide enough room for light and air to pass through. While extensive pruning should be done in the early spring, light pruning may be done at any time of the year. Any low-hanging branches should be removed to maintain the tree tidy and accessible. To provide enough light and ventilation, prune dense regions. Dead wood should be pruned and V-shaped branches should be removed. If you want to maintain the tree on the smaller side, keep pruning the tips off the branches. Always start off cautiously and just cut down a third of each branch's length at a time.
Trees for Avocados to Be Grown
Grafting, layering, or cuttings are often used for propagation. The greatest time to propagate is in the spring when there is a lot of fresh growth. While layering and beginning cuttings are used to create duplicate plants, grafting is often used to blend the beneficial traits of two distinct avocado kinds. Here is how to carry out each propagation technique:
Cuttings
Sharp scissors, potting soil that is both wet and well-draining, a tiny container, and IBA rooting hormone are all required.
Choose fresh growth in the spring that is 5 to 6 inches long and has a number of unopened leaves.
Cut the branch of the new growth at a 45-degree angle using sharp shears.
By scrubbing the bark on each side of the cutting, you wound the cut end. This will promote the growth of roots.
IBA rooting hormone is applied to the cutting.
Bury the cut end in a wet, drained area of the ground.
Place the cutting in a sunny spot while keeping the soil wet.
Gently pluck the cutting to check for resistance after a few weeks; this shows that the cutting's roots have grown. Repot the cutting either outside or in a bigger pot.
Grafting requires the use of sharp snips, a knife, and a covering material, such as grafting tape, to protect the grafted region.
Just like if you were taking a cutting, do steps 1 and 2.
Remove the cutting's tip and any leaves it may have at that time.
Then, make an incision in the tree you want to graft onto by shaving off some of the bark.
Make sure the cambiums of the tree and the cutting are in contact.
Make care to cover any exposed portions before fastening the cutting to the tree.
The grafted branch and the parent tree should merge together in a few weeks.
Air Stacking
To attach the rooting media around the tree, you will also need rope or tape, as well as a rooting medium that may be wrapped around a limb.
Choose the branch you want to use for your new tree.
Cut two rings around the branch with a clean knife to expose a portion of peelable bark.
After the bark has been taken off, scrape the interior branch to remove the cambium.
Compost in a tiny bag (make sure the compost is surrounding the branch, not the bag) or another rooting media may be used to cover the exposed inner branch. Enclose the branch in safety.
It should take several weeks for roots to form. Cut the branch below the newly created roots if this happens, then plant the new tree.
Avocado Trees: How to Grow Them From Seed
A easy and enjoyable endeavor is growing avocado trees from seed. It's crucial to remember that seeds do not always result in trees that are exact replicas of their parent plants. A tiny pot, well-draining potting soil, toothpicks, a sharp knife, an avocado seed, and a container of water are all need for this project. then adhere to these guidelines:
Make three or four holes all the way around the avocado seed with a sharp knife.
Put the toothpicks through the openings. By doing this, you'll build the supports the seed needs to float in the water.
Put the seed's thick, or bottom, end, into the water. The water should contain around one-third of the seed.
Place the seed in direct sunlight, and replace the water every day.
After a few weeks, the top of the seed should develop leaves and roots.
After that, carefully put the seed in a soil that drains properly.
Overwintering
Avocado trees don't need special care in the winter when they are cultivated in the right zones. It is ideal to maintain trees in pots so they may be moved inside or to a location shielded from cold weather if they are grown on the northern borders of their growth zones.
Typical Pests and Plant Illnesses
Mites, caterpillars, borers, lace bugs, and thrips are a few typical pests that may trouble an avocado tree. Cankers, fruit rot, sun blotch, and root rot are a few diseases. Be on the lookout for these pests or any early illness symptoms. The best method to address any emerging issues before they endanger the health of your avocado tree is to take quick action.
1
0


Help
Michub63
2018-08-09

What ID for that tree,growing in Thailand and gives small red rose and sweet sour fruits

0
0
Growing
Michub63
2018-08-07
I now added "Aubergine thaïe 1ers fruits" in my "garden"

1
1
Michub63: il semblerait qu'une macération d'ail frai / eau soit efficace contre les prédateurs en tout genre chats, insectes, chenilles, pucerons etc...!